Moving anything in your workspace or on your website can be tricky without a solid plan.
Migrating your WordPress site isn’t just “copy and paste.” One wrong step and you could lose data, break functionality, or hurt your site’s SEO.
It might sound intimidating, but it doesn’t have to be. With proper preparation, a clear plan, and the right tools, your migration can be smooth, safe, and stress-free.
In this post, we’ve put together a complete WordPress migration checklist so you can move your site with confidence.
You’ll find:
- How to get your site ready before the migration begins
- Step-by-step guidance for safely moving your WordPress files and database
- Post-migration checks to make sure everything runs perfectly
- Real-world examples and common mistakes to watch out for
- Tools and plugins that make migration easier, even for beginners.
Pre WordPress Migration Checklist
Before moving your website to WordPress, proper preparation is essential to ensure a smooth and successful migration. Skipping steps can lead to downtime, broken functionality, or data loss.
Here’s a structured checklist to get your site ready:
- Back Up Your Website – Create a full backup of all files and databases. This acts as a safety net, allowing you to restore your site if anything goes wrong during the migration.
- Update Plugins and Themes – Make sure your core WordPress installation, plugins, and themes are up to date. This prevents compatibility issues and reduces the risk of errors in the new environment.
- Prepare Hosting and Domain – Verify that your hosting environment and domain are properly configured and compatible with WordPress. Having everything ready ensures a smoother transition.
- Schedule the Migration Strategically – Choose a time with minimal site traffic to reduce disruption for visitors and avoid interfering with business operations.
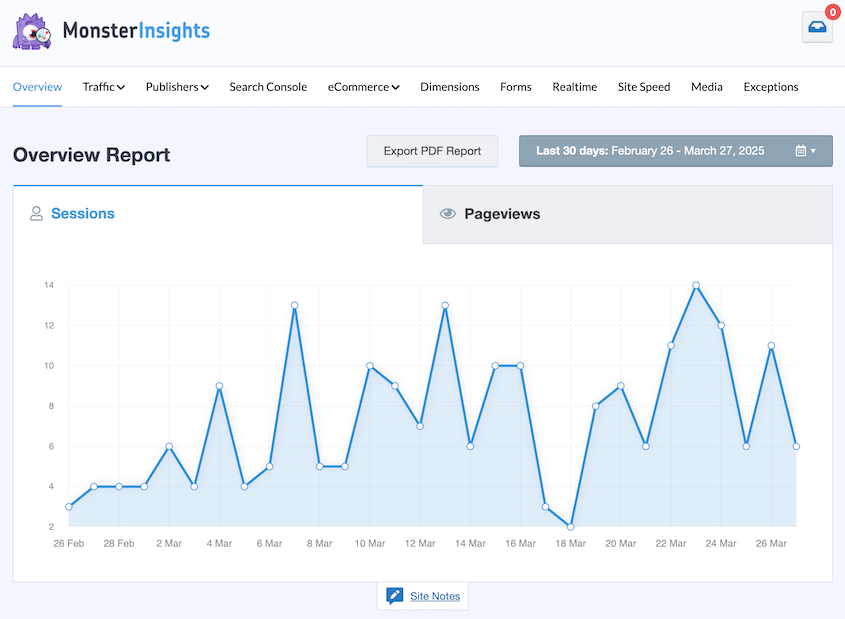
If you’re not sure when to plan your migration, we’d recommend using an analytics plugin like MonsterInsights. This will give you an overview of your organic traffic, so you’ll know when your periods of downtime are.
- Notify Your Audience – If your site is live, inform users about planned maintenance or potential downtime. Clear communication helps maintain trust and avoids frustration.
- Enable Maintenance Mode – Activate maintenance mode to prevent users from accessing incomplete or broken pages during the migration process.
- Disable Conflicting Plugins – Temporarily deactivate caching, security, or redirect plugins that could interfere with the migration workflow. Reactivate them once the migration is complete.
WordPress Migration Checklist
Now that your site is prepared, it’s time to actually move it. The goal here is simple: migrate your website without losing data, breaking functionality, or facing downtime. Here’s a step-by-step checklist to guide you through the process:
1. Choose The Right Migration Method
Decide whether you’ll migrate manually or use a plugin. Manual migration gives you full control but requires deep technical knowledge (handling databases, FTP, and configuration files). Otherwise, you can opt for Plugin-assisted migration makes the process much easier, especially if you’re not comfortable handling everything manually.
Some of the most popular tools you can consider are All-in-One WP Migration, which is beginner-friendly with simple drag-and-drop imports and WP Migrate, a more advanced tool that gives developers fine-grained control over databases and files.
2. Create a Copy of Your Website
Export your existing website files and database. If you’re using a plugin, this is as simple as generating a backup package. For manual migrations, you’ll need to export your database via phpMyAdmin and download files through cPanel or an FTP client.
3. Set Up a New Database
After creating your website copy, the next step is on your new hosting server, creating a fresh WordPress database. And start saving your credentials when importing your site’s data.
4. Update Your Hosts File (Optional)
To avoid downtime, configure your local system to point your domain to the new server before going live. Updating the hosts file allows you to privately test the migrated site while your live site continues to function for visitors.
5. Import Files and Database
Transfer your website files and database to the new server.
- With a plugin: Upload your backup archive and follow the plugin’s restore process.
- Manually: Upload files via FTP and import the database into your new MySQL instance, then update your wp-config.php file with the new database credentials.
6. Update URLs and Links
After migration, ensure all internal links, image paths, and permalinks point to the new environment. Most migration plugins handle this automatically, but if you’re doing it manually, use a search-and-replace tool to update old URLs.
7. Verify the Installation
Once the migration is complete, log in to your WordPress dashboard on the new host. Check that your plugins, themes, and media files are intact and functioning.
How to Ensure Your WordPress Site Launches Smoothly
Once you’ve migrated your files and database, the next step is making sure your new WordPress site delivers a seamless experience for users.
Here’s what to check after completing your migration:
1. Test Your Website’s Speed and Functionality
Start by reviewing your new site thoroughly. Make sure pages load correctly, forms submit without errors, and key functions are working as intended. It’s also worth checking site speed.
If you’ve upgraded to a stronger hosting plan, you should see faster load times. Tools like GTmetrix, Pingdom, or Google PageSpeed Insights can help you benchmark performance.
2. Scan for Broken Links
Migrations can sometimes leave behind broken links, which frustrate users and hurt SEO. Run a site-wide scan with a tool like Screaming Frog or an SEO plugin to identify and fix these issues quickly.
While you’re at it, don’t forget that broken links are just one of many security gaps a site can face.
Check out our guide on common WordPress vulnerabilities to make sure your website stays protected beyond migration.
3. Set Up Redirects (Optional)
If you’ve moved to a new domain, make sure visitors and search engines are automatically sent to the right place. Set up 301 redirects from your old URLs to the new ones so traffic flows and your SEO value carries over.
4. Update DNS Settings
To finalize the move, point your domain to your new hosting server by updating your DNS records. Be aware that DNS propagation can take up to 48 hours worldwide, so allow some time for the change to settle in.
5. Notify Google of the Migration
Protect your search rankings by updating your site information in Google Search Console. Use the “Change of Address” tool if you switched domains, and re-submit your sitemap so Google indexes the new site correctly.
6. Verify Your SSL Certificate
Security is non-negotiable. Test your SSL certificate after migration to ensure data is encrypted and your site loads with the secure padlock symbol. If there are errors, resolve them quickly before visitors encounter warnings.
7. Crawl the New Site
Running a crawl with a tool like Ahrefs or SEMrush helps you spot issues that might not be obvious, such as duplicate content, missing metadata, or unexpected redirects. This step is especially important for businesses relying on SEO performance.
8. Run Final Functional Checks
Double-check technical details like permalink structures, database connections, analytics tracking, and marketing pixels. Browse the site on different devices and browsers to confirm consistent performance. If your website relies on customer feedback, consider running a quick survey to catch anything you missed.
9. Decommission Your Old Hosting Account
Once you’re confident the new site is stable, you can close your old hosting account. Wait 30–60 days to be safe and export any remaining data you might need. If you’re too worried about handling it on your own, consider a trusted WordPress migration service to wrap things up smoothly.
Conclusion
Getting your WordPress migration right means more flexibility, stronger performance, and long-term growth, making the extra effort in planning your migration or choosing the right WordPress development company well worth it.